|
When Mrs. Thompson asked me about doing something different than reading packets and answering questions for their state project, I was eager to find something interactive and exciting for the students to try. Enter Animoto.
Animoto is great for musical slideshows. It's easy to use and makes attractive shows. We wanted to take it a little further though. Some groups wanted to make Chamber of Commerce type videos, with speaking instead of music. After thinking about it, I went with using Audacity (a great FREE program that records audio). Students put their images into Animoto to create the slideshow. Audio was next, and some chose to use subtitles with music in the background while others recorded their audio. Those that recorded their own audio opened Audacity (note: have the microphone plugged in BEFORE opening Audacity, or you get a weird humming sound when you record) and created side-by-side windows of Audacity and their video. Students pressed 'Record' in Audacity and 'Play' on the preview, recording their voice as they watched the video. Afterward, they exported the audio as an MP3, inserted into the song section of Animoto, and produced it. Voila! Videos created! Check them out below.
0 Comments
When the idea of digital volunteers was presented at the #gafesummit I attended, I knew that was something I could easily take back to my school. One teacher in third grade really took to the idea. This year Mrs. Westhoff has been using digital volunteers for her students' papers they type in Google. The first papers they sent out they were nervous for feedback. She sent out an email that identified what the students were working on and then the specifics the people should be editing and revising. These editors have been teachers, administrators, school board members, and community members. It has been great to get different people involved in what our students are doing. Here is the email she sent out for the last paper they shared... "Thank you so much for volunteering again to be a Digital Volunteer. My students have been working so very hard on "Animal Reports" and should have received it this morning. A little background: My students brainstormed various animals, chose one, and completed research in four main areas- general animal facts, habitat, interactions, and babies. After the report was written, students then supported their text with appropriate nonfiction text features. Things to look for / comment on: - introducing a topic or new information - nonfiction text features support understanding (and not too many) - information given are FACTS (not opinions) - concluding statements - Grammar: includes but not limited to capitalization, punctuation, use of commas, spelling common words and homophones correctly - General comments such as areas where the student did well in You will receive a notification in your inbox notifying that a student shared their document with you. Next, comment away! If you have any questions or concerns, please let me know at any time. If you could have them done by next Friday, March 11th that would be fabulous! Thank you again for your time and enthusiasm. " Her class just sent out their papers for this second round of digital volunteers. They asked to have their volunteers look at their papers this time because they like getting the outside feedback. It is important to share work outside the 4 walls of their classroom, so they can see that their work matters.
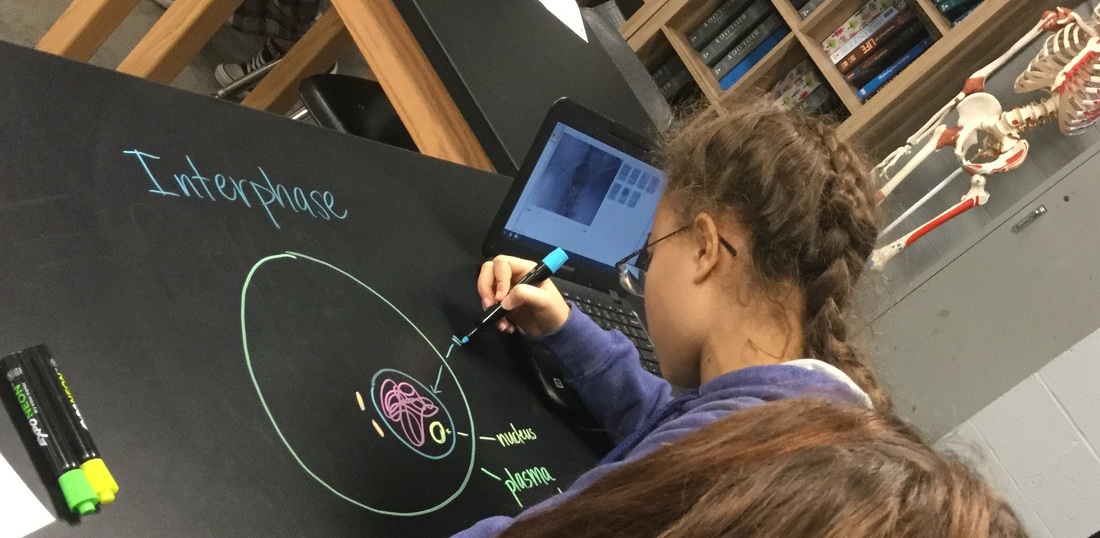
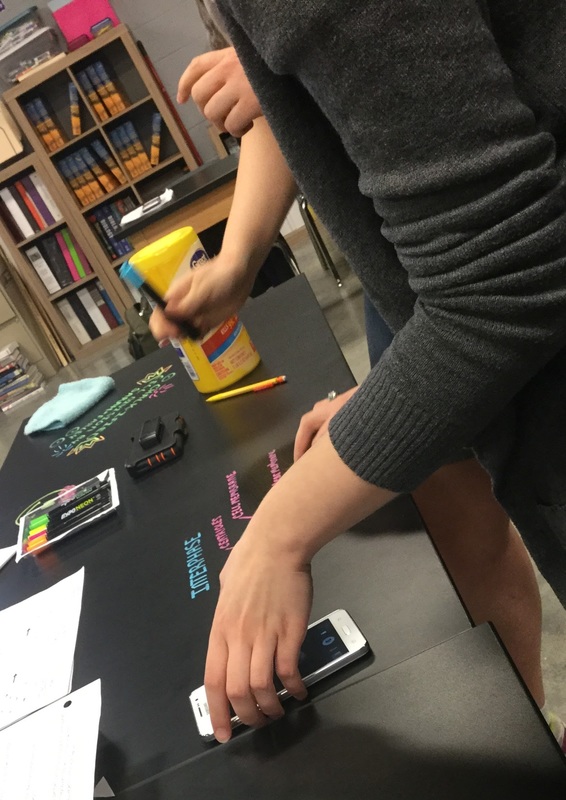
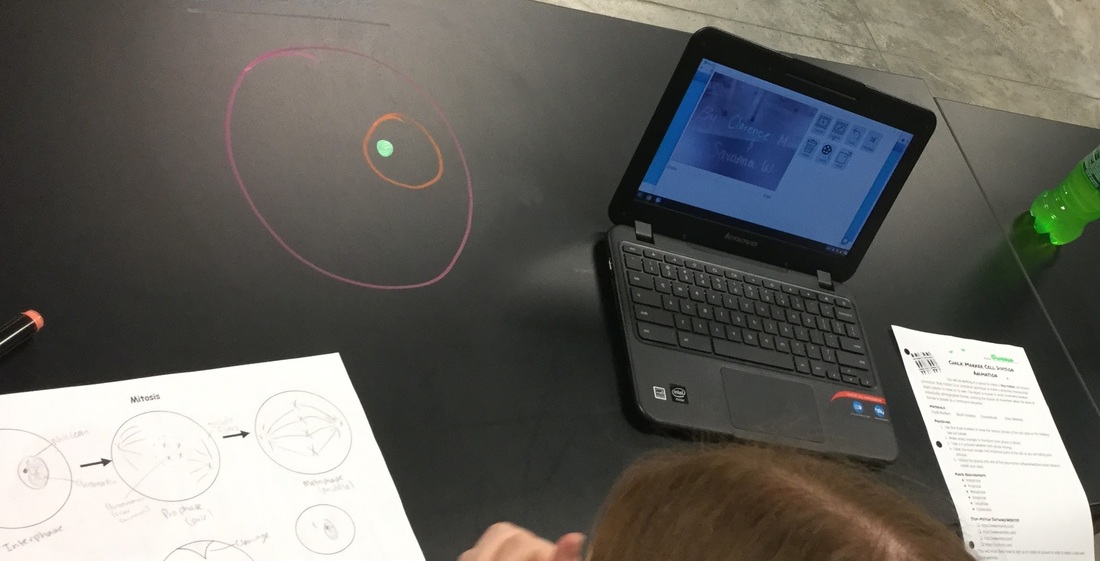
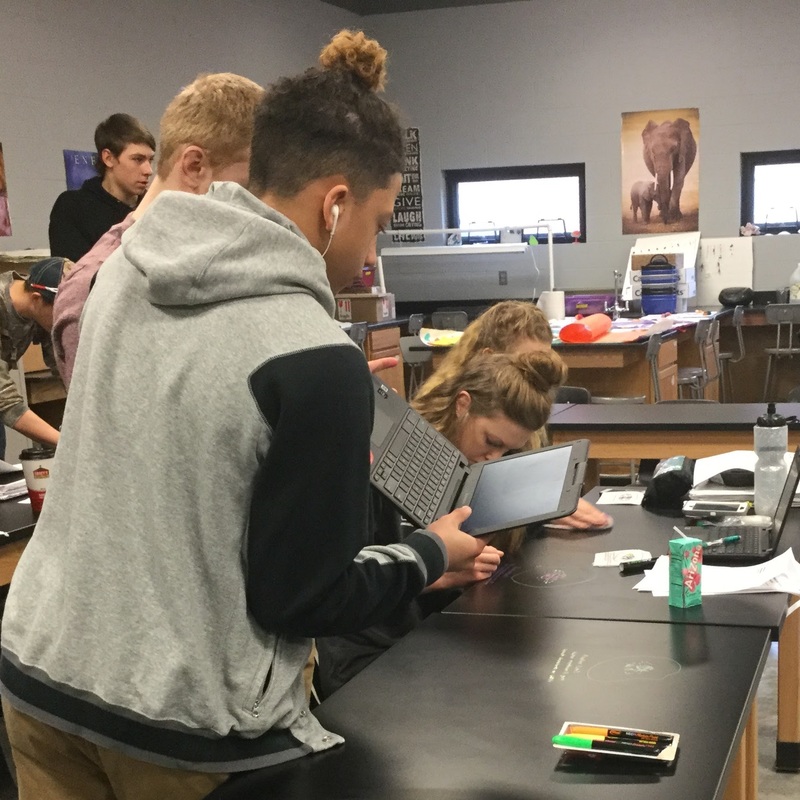
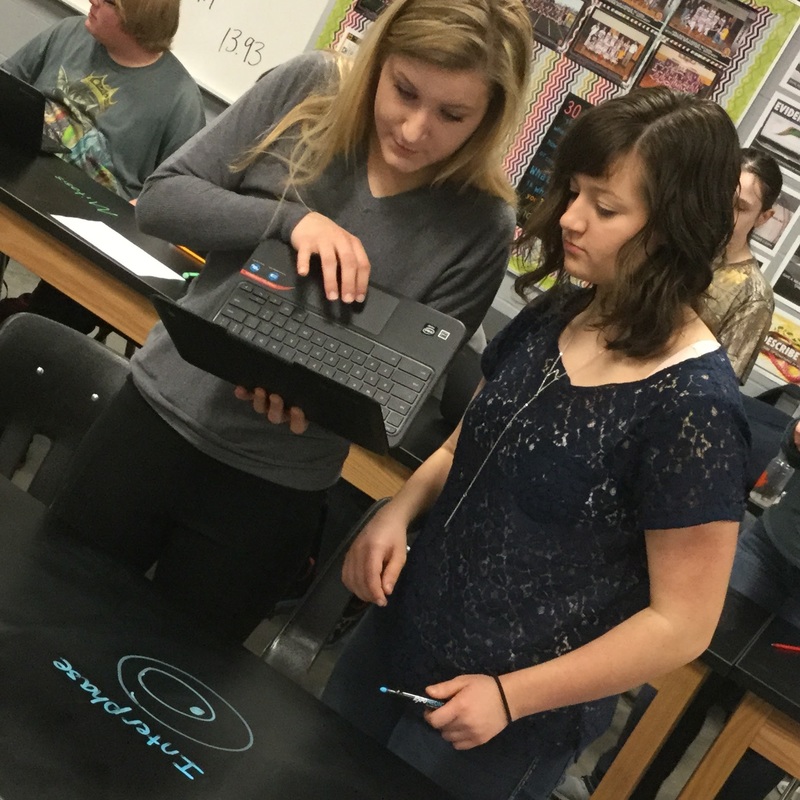
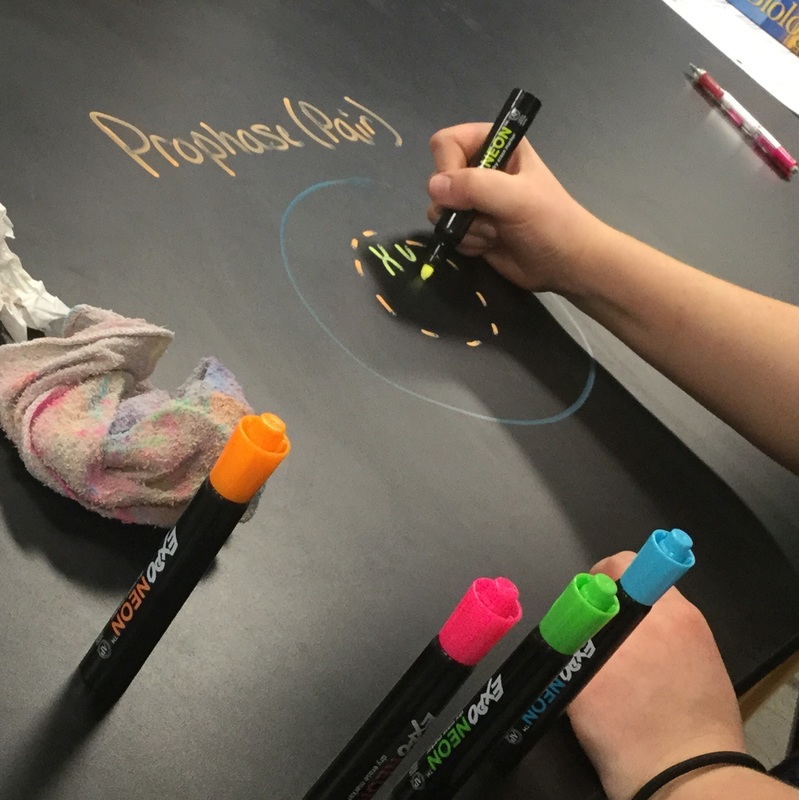
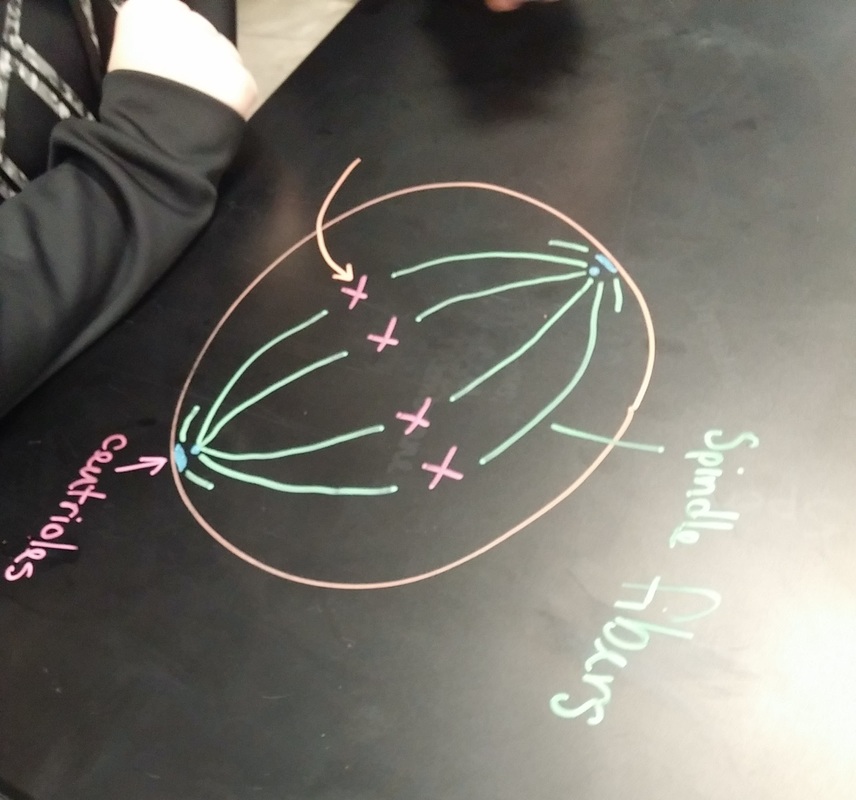
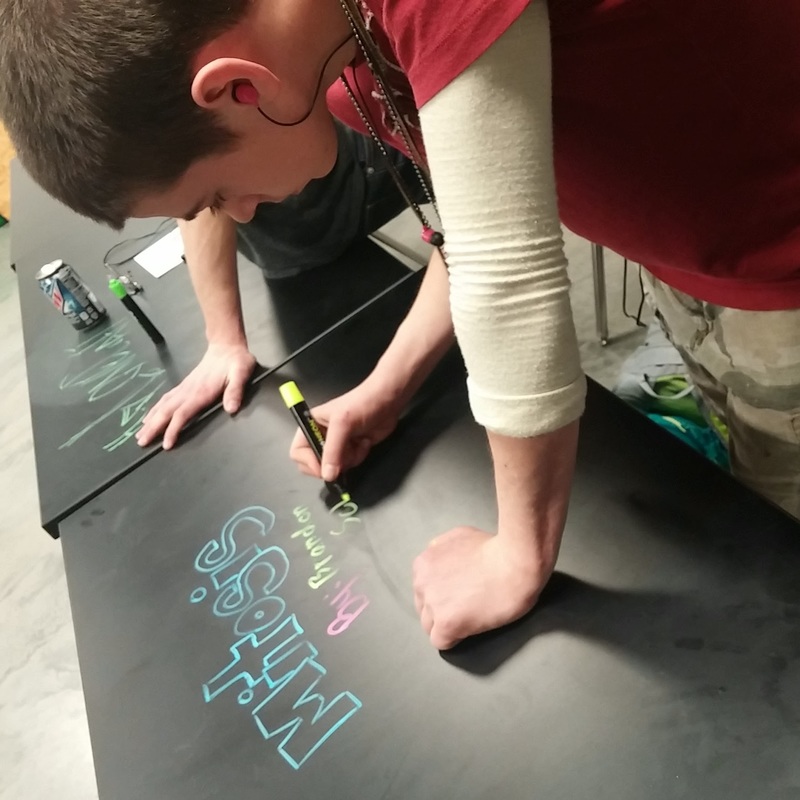
Think about digital volunteers for your classroom! It took me about 10 minutes to look through and comment on 2 papers - not a big time commitment for such a great experience for students. When the dynamic Erin Snelling approached me about wanting to do videos for cell division in her high school biology classes, I was quick to send back some ideas of what she could have students use. After going in her room to assist, I quickly saw that she wanted stop animation for this project. Because of the ease of adding apps to the Chromebooks, I was able to quickly push Stop Motion Animator out to her students. This has to be one of the easiest apps to use. Students needed very little guidance to get going on this, exploring and figuring it out for themselves. To be honest, this app needs very little explaining - very simple.  Stop Motion Animator on Chrome Stop Motion Animator on Chrome Students were given chalk and neon markers and were told to draw on the tables. Gasp! Yes, draw on the tables. Erin has black-topped tables, which were perfect for the chalk markers (we recommend Expo neon markers because they were the brightest). Students would draw a little, snap a photo, draw a little, snap a photo, and so on. When they needed to erase, they grabbed a wet towel and a dry towel, did their business, and continued on with the videos. Students drew the stages, using their notes, and were told to label specific parts. Erin gave them a directions sheet the day they started, which had their requirements listed for each phase of mitosis. Something I found interesting, students who typically weren't engaged in other classes I had seen them in, were engaged in this lesson. Although some of them were chatting or slightly off-topic, their work was still getting done and they would problem-solve together. Students were engaged and participating in their learning...they got excited when they heard they were asked to draw on the tables. Just by drawing on their desks, this adds engagement to the lesson. Seriously, this makes me want to buy markers for everyone just for them to write on their tables! I am including some of the finished products for your viewing pleasure! Please comment or retweet this to someone who may be inspired! Note: they may have added some silly photos in the endings of their vids...just playing around with the tool! Lol!
**A couple of great appy things - some kids had to come back to their videos the next day, and it was easy to load their videos from the day before and move forward. Then some of them finished and were able to move their videos to their Drive and share them.
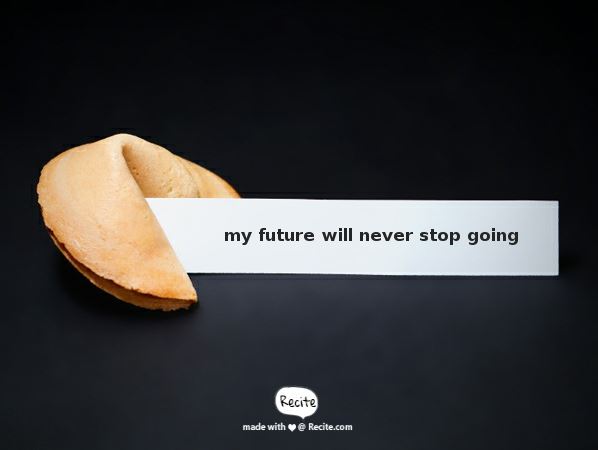
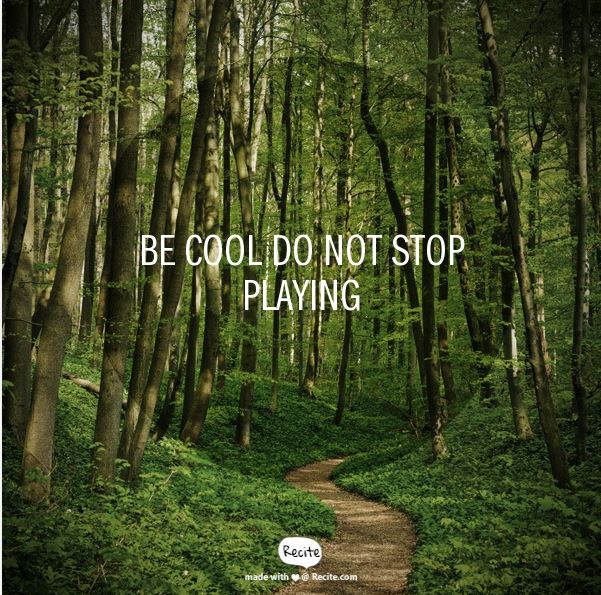
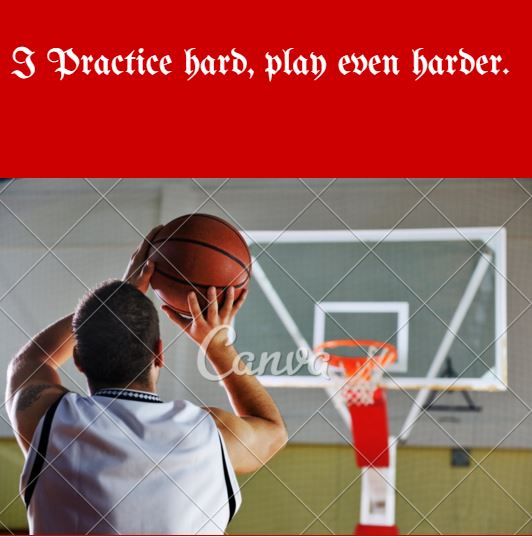
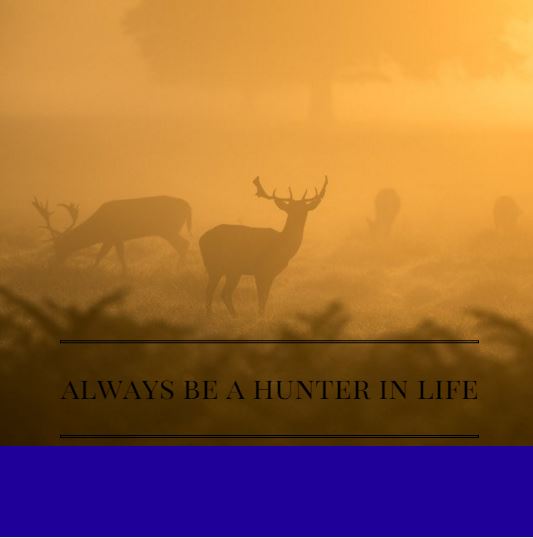
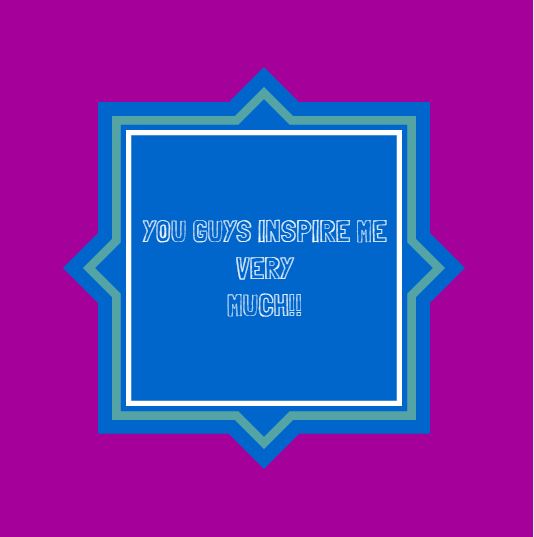
A few things I learned about third graders this week that I had maybe not given them enough credit for or that I had forgotten since the 6 years ago that I had taught them -- they are profound and have some deep thoughts. This week we started working on 6 Word Memoirs. This was a project I had heard about from Twitter, with many of the students being middle school or high school that had created them. I wanted to see how I could adapt it with third grade in the 50 minutes I get with each class once every 6 days. The first thing I started with was showing them "6 Word Memoirs for kids" in a Google search. We talked about what they observed - 6 words, about a person, funny, inspirational. Then I gave some examples to them and talked to them about what a memoir was. Then I showed them how to create and they were off. CreationTwo sites have been used - Canva and Recite. There is a great difference between these sites, and I am so glad I have used both. I can see the pros and cons to both. Canva is more intricate with more opportunities for creativity and creation. Users can choose their backgrounds, add images, decorative fonts, and other things that personalize their creation. Recite allows the user to type in their words and then pick from a pre-made background. Canva is terrific if you have a lot of time for create or if you want a very customized project. Recite is great if you really just want some text on an interesting background because you can't add anything else to them. It is also great for differentiation in class. If you have students who would be overwhelmed with Canva, they can get good results with Recite. Finally, they took the link and put it in a shared Google Sheet next to their name. Then classmates could look at each other's work. Very powerful. I then shared a bunch on Twitter. Check out the bottom for some of the awesome creations from these third graders! #6wordmemoirs Made with ReciteI truly believe in student voice. #6wordmemoirs Made with CanvaAfter watching Kristin Ziemke speak at the TAWL conference, I knew I wanted to utilize some of the great things she was doing with her students in her classroom. One of those was having students in the lower grades record their voices talking about the books they are reading.
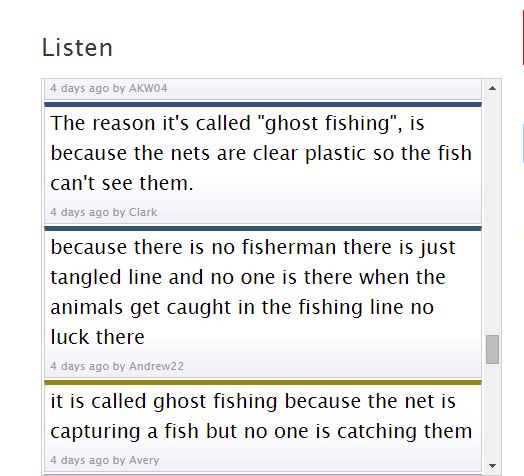
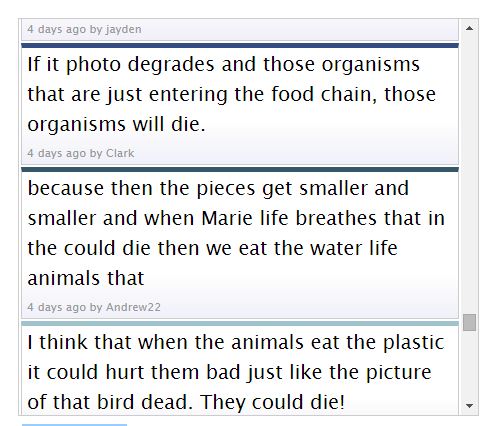
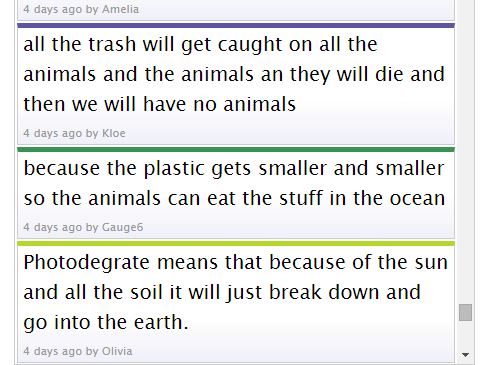
She had this great idea for creating a recording booth for kids, where they can sit and record their conversation about reading on an iPad, or other recording device, and send it to the teacher. I searched around for what app I wanted to test this out with, and settled on Educreations. I thought this would be a simple app for 1st graders to use, and I was right! I went in to a couple of classrooms, Ms. Sutter and Mrs. Hague were kind enough to share some of their kiddos with me, and worked with a couple students. They were handed the iPad, took a photo of their book, pushed the record button, talked about either the plot of their book or their favorite part, and then rated it by drawing 1-5 stars on the image. Of course they did a wonderful job! This would be a great tool to use for fluency checks and for retelling. I think about all those times that I would intend to get through 5-6 conferences with kids, only to get stuck on conference number 2 or get called away in the middle to tend to something else. If a teacher had a "recording corner" in their room and a rotation schedule, students could talk about their reading often and the teacher could listen to it when it best suited them, as well as have a recording to keep for student records. Below, I have linked these videos for you to view. One thing about Educreations, to download the video you have to buy the Pro account. If you don't have the Pro account, you can copy the links to the videos to share them! I had a teacher brave enough to try out a site called TodaysMeet. I had used it at a couple of conferences, heard great things about it, but had not had a chance to use it yet. But now, I have! TodaysMeet is a website where you get a chance to have students back-channel. That is explained more in this post and this post. Before the lesson, I showed students what TodaysMeet was all about, how to sign in, expectations, proper commenting, etc. We broke them into 3 different rooms with about 6 students per room. We did this to make the chat window a little less overwhelming. I highly recommend that for the lower grades and for just starting out, especially if you are allowing for free-talk throughout a lesson. Students listened to their teacher, Mrs. Thompson, read a really interesting article about garbage patches in the Pacific Ocean (and if you have never heard about these, wow, look it up). They typed their thoughts as she read, but she also posed questions for them for two reasons. One reason she did this was so that students that were struggling to come up with something, had a prompt. Other times, she needed them to comment on a specific question. In order to have students reflect back over what the others wrote, she asked for volunteers to read their comments OR the comment of someone out of their group. I liked this method because there were quite a few students that really liked what someone else said. Students told me they really liked this because they were all able to have a voice and contribute to the conversation. Looking at the comments, it was awesome to see what some of their thoughts were. They were pretty profound and deep. I am going to attach some screenshots of their conversations below in the gallery. I highly recommend this method of discussion in the classroom. Students and teachers could benefit from this resource. If you want something like TodaysMeet, you could also try Padlet. In a classroom teachers spend a lot of their time asking questions. These questions usually result in 2-3 students adding input and then you move on to the next topic. One thing I disliked about this is that I always saw the same 4-5 hands up, didn't hear from all of my students, and lessons lacked engagement. When I attended the EdTech Team Google Summit, I saw a tool used called TodaysMeet. It was said that the kids were backchanneling when using this website. Backchannel, hmmm, what does that even mean? Well, it is really just students using computers to take part in an real-time digital conversation as an activity is occurring in the classroom. TodaysMeet is a great website for this. I love how user-friendly it is for me to go to and use. You can go, name your room, keep it open for a chosen amount of time (hours to weeks), and get a custom URL that lasts through that time period. Why Backchannel?
Example Activities
By backchanneling in your classroom, you are encouraging students to have a voice. It almost validates their thoughts and opinions, too, because you are asking for ALL of their opinions. This also opens up more meaningful conversations and can help students learn about each other more.
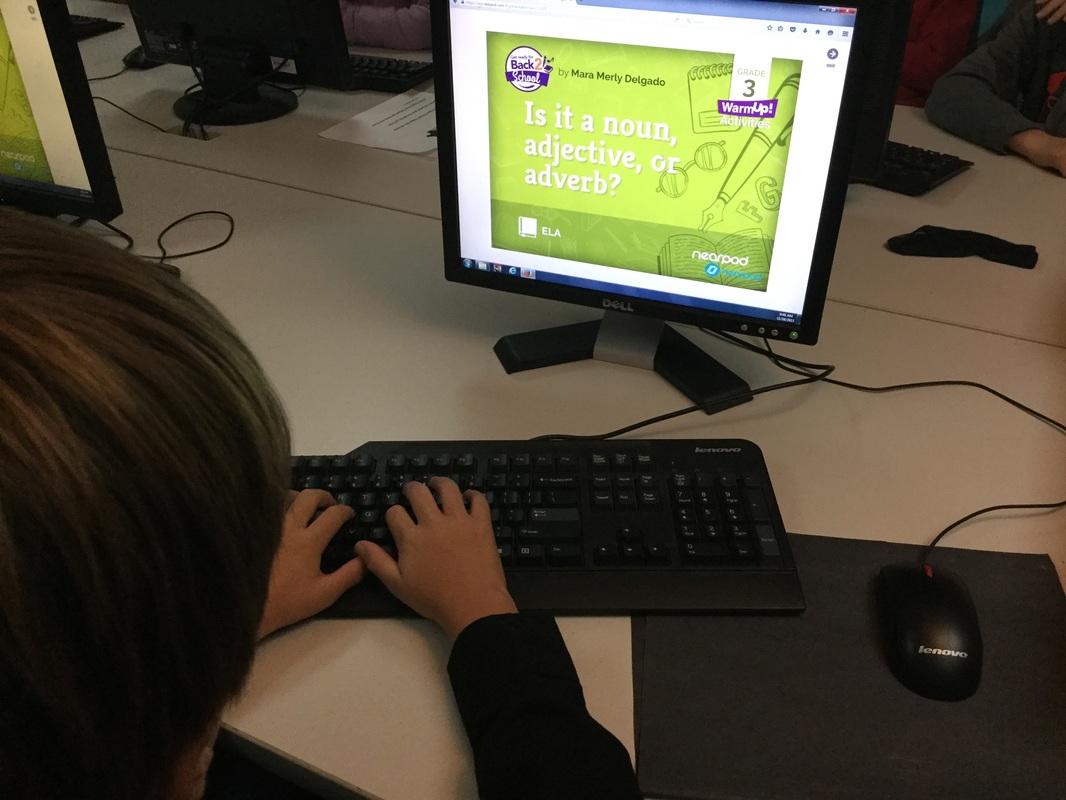
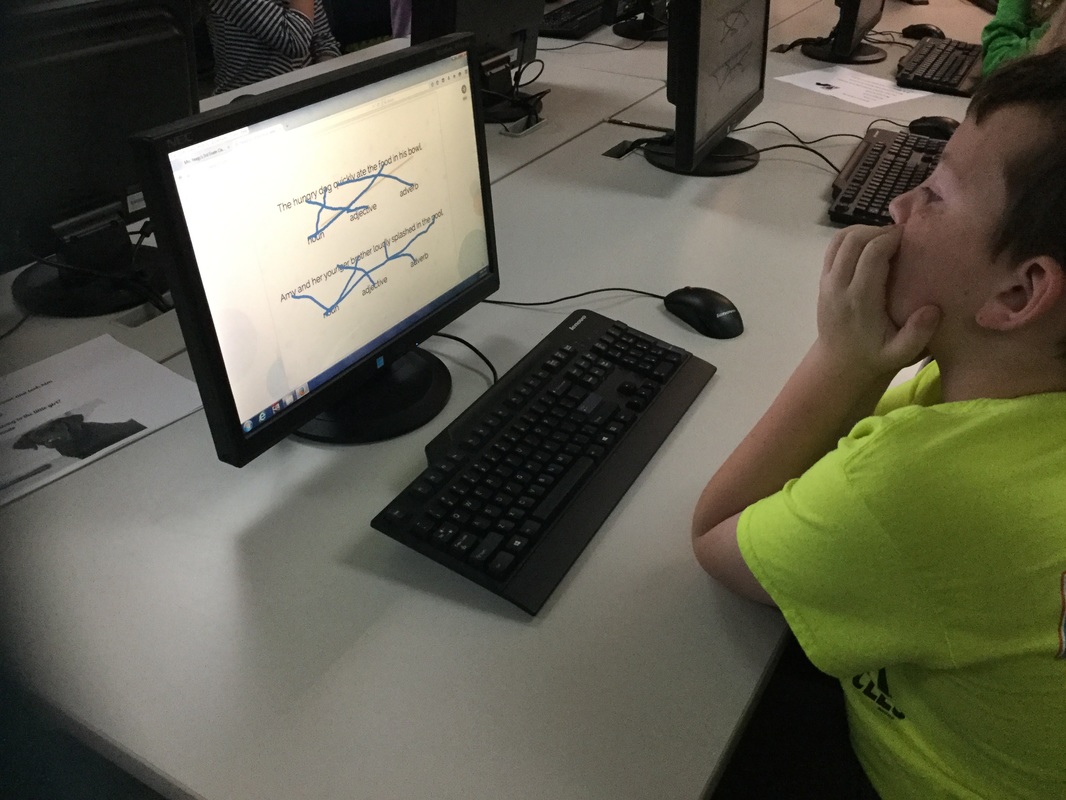
 If you are a person who thinks they are "technically challenged" or want to use tech in the classroom but aren't sure how to start, I think I have your first solution. Nearpod is a website that allows you to find or create interactive lessons that will engage your students. Here's a quick "how-it-works":
A veteran teacher I have used it today with her students. She told me she edited a lesson that was free and was able to add PDFs and questions with no problem. Her response to how it went, "It was one of the most engaging lessons I have ever taught." How could you NOT want to use this?? Students love being a part of the lesson with the tools available. I like that you can push a question out in the middle of a lesson if you feel students need something new. It is SO easy to insert something into the presentation, maybe a website link or a question to assess their learning. I feel this is one of the easiest ways to infuse your teaching if you are uncomfortable at all with technology. This is a tool that would be very useful to you! And their 360 cities lessons are amazing virtual tour lessons. I did these with some kids, and it was amazing! Students were squealing over the fact that they were able to go to Mars. Yes, Mars! *They also send out a lot of coupons and specials for their lessons. Some of the packs are pretty pricey, but you do get a lot of content. Oh, and you sign up with your Google account, even better! During a meeting on our work day before 2nd semester started, the website Educanon came up in the discussion. I had explored this site before, but many had not. So I thought this was an appropriate time to create an Under 5 installment to inform those of the awesomeness that is Educanon. If you love using videos in class or want to create a flipped or blended classroom, this site is going to be the best thing to happen to you right now! Educanon is a site (and can be found in the Chrome App Store) that allows the user to insert questions throughout a given video. You can even create your own video, save it to your Google Drive, and do this process! I love it! It is also super easy to incorporate with your Google Classroom with the sync feature they have. Check out more about it in my Under 5 video! If you are anything like me, you often find yourself trying to create a review game of Jeopardy using PowerPoint in a hurry before the bell rings. What ultimately happens when you do this? Of course the hyperlinks don't work, previously clicked-on boxes aren't colored differently, questions and answers don't match up...and you are in tears on the floor hoping something magical happens. No worries, magic has happened! It is in the form of a great site called FlipQuiz. This is a great way to quickly create a Jeopardy-like game in a time-saving way. It automatically generates your board, links your questions, changes colors upon clicks (allows you to change them back if someone gets it wrong and you want to put it back in play), allows you to search public boards, and more! The free version of this is great! However, the PRO version does allow you a few creature comforts you may enjoy! It will create digital flashcards your students can access at home,the ability to upload images to the question tiles (awesome!), create custom points, and the ease of copying and editing other boards. Check out my Under 5: FlipQuiz video on this! |
AuthorFifth grade teacher in a 1:1 iPad classroom, sharing my journey with technology in the classroom Categories
All
Archives
March 2020
|


 RSS Feed